

Learn how to repair a cracked phone screen with this step-by-step guide. Discover whether you can fix it yourself or if you need professional help.
Fix Your Cracked Phone Screen Quickly and Safely with These Methods
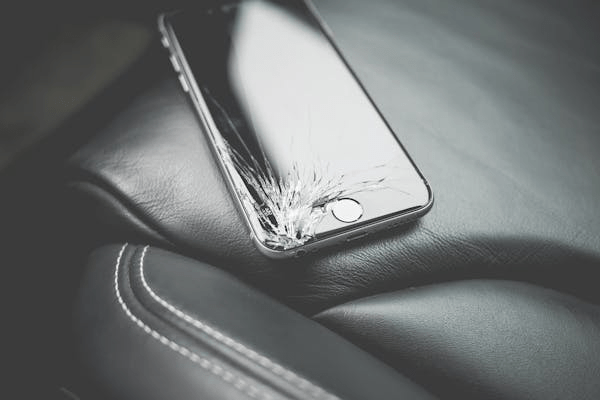
A cracked phone screen is one of the most common phone problems. While it might seem like a daunting task, there are a few ways to repair it, depending on the severity of the damage. This guide will walk you through the options, from DIY fixes to professional repairs, helping you choose the best method for your device.
Step 1: Assess the Damage
Before deciding how to repair your cracked phone screen, it’s important to assess the extent of the damage.
- What to Do:
- Inspect the crack to determine if it’s just the glass or if the LCD (display) is damaged as well.
- Check if the screen is still responsive to touch and if any areas are unresponsive or showing discoloration.
- If the screen is only lightly cracked but still functional, you may be able to use a DIY repair or a screen protector to prevent further damage.
Step 2: Decide Between DIY Repair or Professional Help
Depending on the severity of the damage, you may choose to repair the screen yourself or take it to a professional repair service.
- DIY Repair:
- If the crack is minor and you are comfortable with electronics, you can attempt a DIY repair using a screen replacement kit. This option is more affordable but requires skill and the right tools.
- If you’re inexperienced, it’s advisable to avoid this method as it could lead to further damage or void your warranty.
- Professional Help:
- If the screen is severely cracked or the touch functionality is compromised, taking the phone to a professional repair service is the best option.
- Authorized service centers or reputable third-party repair shops can replace the screen with original or high-quality parts, ensuring a proper fix.
Step 3: Gather the Tools for DIY Repair (If You Choose This Option)
If you decide to repair the screen yourself, you’ll need the right tools to avoid causing more damage.
- What You Need:
- A replacement screen for your specific phone model
- A small screwdriver (usually Pentalobe or Phillips)
- A suction cup tool to remove the screen
- A plastic pry tool to detach the screen from the body
- Adhesive strips or glue to attach the new screen
- Anti-static wristband to protect the internal components from static electricity
- A heat source, such as a heat gun or hairdryer, to soften the adhesive
Step 4: Prepare Your Phone for Repair
To begin the repair, you need to safely prepare your phone by turning it off and detaching any accessories.
- What to Do:
- Power off your phone completely before starting the repair to avoid damaging the internal components.
- Remove the SIM card and memory card if applicable.
- Place your phone on a clean, flat surface and make sure you have all the necessary tools and parts nearby.
Step 5: Remove the Cracked Screen
The next step is to carefully remove the broken screen from the phone body.
- What to Do:
- Use a heat gun or hairdryer to soften the adhesive around the screen. This will make it easier to separate the screen from the phone body.
- Use the suction cup tool to gently lift the screen from the edges, creating a small gap between the screen and the body.
- Insert the plastic pry tool into the gap and carefully work your way around the screen to detach it without damaging the internal components.
- Once the screen is loose, carefully remove it, being mindful of any attached cables or connectors.
Step 6: Install the New Screen
Once the cracked screen is removed, it’s time to install the new screen.
- What to Do:
- Attach the new screen to the phone by reconnecting any cables or connectors that may be attached.
- Carefully position the new screen in place and press it gently into the phone body.
- Use adhesive strips or glue to secure the screen if needed.
- Make sure everything is aligned properly, including the edges and the buttons.
Step 7: Test the New Screen
After installing the new screen, you’ll need to check if it’s working correctly.
- What to Do:
- Power on your phone and check the touch functionality. Make sure the screen is responsive and that there are no dead spots or discoloration.
- Test the display by playing a video or looking at bright images to ensure the screen’s clarity and brightness.
- If everything works correctly, your repair is complete!
Step 8: Consider Applying a Screen Protector
After repairing your screen, it’s a good idea to protect it from future cracks or scratches.
- What to Do:
- Apply a screen protector to safeguard the new screen from accidental drops or further damage.
- Choose a tempered glass screen protector for maximum protection and durability.
Conclusion:
Repairing a cracked phone screen can be a manageable task if approached carefully, whether you choose to do it yourself or seek professional help. If you’re going the DIY route, make sure you have the right tools and experience to avoid causing more harm to your device. If the damage is significant or you’re unsure, visiting a professional repair service is always a safe and reliable option. With proper care and protection, your phone screen will be as good as new, ready to serve you again!
A Real-Life Experience: My First Phone Screen Repair
A while ago, I dropped my phone, and the screen cracked badly. At first, I panicked, thinking it was beyond repair, but after a quick assessment, I realized the screen was still responsive, just cracked.
I decided to attempt a DIY fix. I carefully ordered a replacement screen, gathered the tools, and followed an online guide. The process wasn’t easy—removing the old screen and installing the new one was tricky, and there were a few tense moments. But once the new screen was in place, I powered it on, and everything worked perfectly.
In hindsight, it was a rewarding experience. I saved money and learned a lot, but I’d recommend a professional repair if you’re unsure or if the damage is severe.

