

Learn how to repair a broken window with this comprehensive guide. Follow simple steps to safely replace the glass, fix the frame, and restore your window.
Fix your broken window quickly and safely with this easy-to-follow guide.
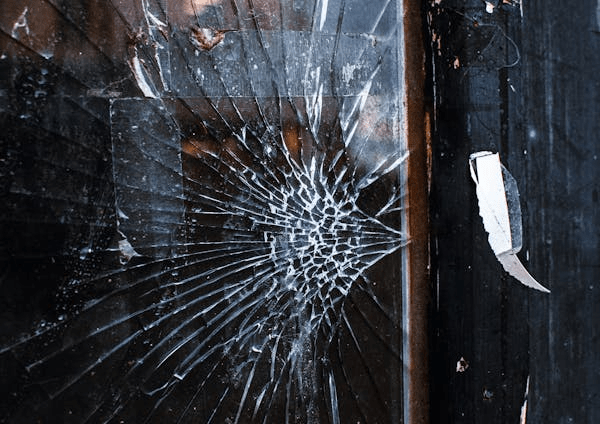
A broken window can be both a safety hazard and an energy drain, but repairing it doesn’t have to be complicated. Whether the glass is cracked or shattered, this guide will walk you through the steps of replacing the glass, fixing the window frame, and ensuring everything is properly sealed. Whether you’re a DIY beginner or an experienced homeowner, these tips will help you restore your window to its original condition in no time.
Step 1: Assess the Damage
Before starting the repair, assess the damage to determine what parts need to be replaced.
- Inspect the Glass: Check if the glass is cracked, chipped, or completely shattered. If only a small crack or chip is present, you may be able to repair it with resin or epoxy rather than replacing the entire pane.
- Examine the Frame: Look at the window frame to ensure that it’s not damaged or warped. If the frame is compromised, you may need to replace it or fix it before proceeding with the glass repair.
Step 2: Gather Your Materials
Make sure you have all the necessary tools and materials before starting the repair.
- Tools: Screwdriver, putty knife, utility knife, measuring tape, hammer, safety gloves, and goggles.
- Materials: Replacement glass (cut to size), glazing points or clips, window glazing compound or putty, a wooden or metal window frame (if necessary), and caulk or weatherstripping for sealing.
Step 3: Remove the Broken Glass
Once you’re ready to start, remove the broken glass carefully.
- Wear Safety Gear: Always wear gloves and goggles to protect yourself from glass shards.
- Remove the Window Sash: If the broken window is part of a sash, remove the sash from the window frame by unscrewing the screws or releasing the clips.
- Take Out the Broken Glass: If the glass is still intact, carefully tap it with a hammer to break it into smaller, manageable pieces. Use pliers to pull out the glass shards. If the glass is already shattered, gently pick out the pieces. Dispose of the broken glass in a safe container.
- Remove Old Glazing: Use a putty knife to scrape away any old glazing compound (the material that holds the glass in place). Be sure to clean the window frame and remove any old nails or clips that may be holding the broken glass in place.
Step 4: Measure and Cut the New Glass
Once the old glass is removed, measure the opening for the new glass pane.
- Measure the Window: Use a measuring tape to carefully measure the width and height of the window frame. When measuring, subtract about 1/8 inch from each dimension to ensure the glass fits properly.
- Cut the Glass: If you’re using a pre-cut piece of glass, skip this step. If you need to cut the glass yourself, score the glass with a glass cutter along the measured line, then snap it along the score. Glass can be purchased at most hardware stores and can be cut to size.
- Test the Fit: Gently place the new glass into the window frame to ensure it fits properly.
Step 5: Prepare the Frame for Installation
Before installing the new glass, prepare the frame for a secure and tight fit.
- Apply Glazing Compound: Roll the glazing compound into small ropes and apply a thin layer of it along the edges of the window frame where the glass will sit. This will help seal the glass and hold it in place.
- Insert Glazing Points: Place glazing points or clips along the window frame, pressing them into the frame with a putty knife. These will hold the glass securely in place. Make sure the points are spaced evenly along all sides of the frame.
Step 6: Install the New Glass Pane
Now, it’s time to install the new glass.
- Place the Glass in the Frame: Carefully set the new glass into the window frame, pressing it gently into the glazing compound.
- Secure the Glass: Press the glazing points or clips into the frame to hold the glass in place. Use a putty knife or small hammer to ensure the points are secure, but be careful not to break the glass.
Step 7: Apply the Final Layer of Glazing Compound
To ensure the glass stays in place and is properly sealed, apply a final layer of glazing compound.
- Smooth the Glazing Compound: Apply another layer of glazing compound around the edges of the glass, using a putty knife to smooth it out evenly. The compound should cover the edges of the glass and be flush with the window frame.
- Create a Smooth, Finished Edge: Use the putty knife to create a clean, smooth edge around the glazing compound for a neat appearance.
Step 8: Allow the Glazing to Dry
Before reinstalling the window sash or using the window, allow the glazing compound to dry and cure.
- Wait 24-48 Hours: Allow the compound to dry for at least 24 hours, and up to 48 hours depending on the weather and the type of glazing compound used. This ensures the glass is securely held in place and the seal is tight.
Step 9: Reinstall the Window Sash (If Applicable)
If the window was part of a sash, reinstall it once the glazing compound is dry.
- Reattach the Sash: Place the sash back into the window frame and secure it with screws or clips. Ensure it moves smoothly and that the glass is properly sealed in place.
Step 10: Seal and Insulate the Window
To finish the repair, check for any gaps around the edges of the window and ensure proper sealing.
- Check for Gaps: Use a flashlight to check for gaps around the window where air could enter.
- Apply Caulk or Weatherstripping: If needed, apply caulk around the edges of the window or use weatherstripping to seal the perimeter, preventing drafts and improving energy efficiency.

Bonus Tips for Window Repair
- Use Safety Glass: Consider replacing regular glass with safety glass, such as tempered or laminated glass, which is less likely to break into sharp shards.
- Double-Check Glass Type: If your window is double-glazed or has special features like tinted or low-E glass, make sure you match the new glass with the same specifications.
- Consider a Professional: If the damage is extensive or the window is part of a complex installation, it may be a good idea to consult a professional to ensure proper installation and avoid damage.
- Clean the Glass: After the repair is complete, use a glass cleaner and a soft cloth to clean the new glass, leaving it clear and streak-free.
Real-Life Experience: My First Window Repair
A few years ago, a strong wind storm blew through my neighborhood, and I came home to find a large crack running through my living room window. Panicked, I quickly realized I needed to fix it, but had never attempted a window repair before. After gathering materials like gloves, a utility knife, and the correct glass size, I set to work.
The first step was the hardest—removing the broken glass carefully. I made sure to wear safety gear, clean up the shards, and scrape away the old glazing compound. With some patience, I measured the new glass and installed it. Applying the final glazing compound took a bit of practice, but after a few hours of work, the window was back to normal.
While the repair took time and effort, it was incredibly satisfying to restore the window myself. If I’d known how easy it could be, I would have tackled it much sooner!


