

Learn how to build a computer from scratch with this easy-to-follow guide. Discover the essential components, tools, and steps to create your own custom PC.
Assemble Your Dream PC with This Detailed, Beginner-Friendly Guide
Building your own computer can be an exciting and rewarding project. Not only will you have a machine tailored to your needs, but you’ll also gain a deeper understanding of how computers work. This guide will walk you through the entire process, from choosing the right components to assembling them and getting your new PC up and running.
Step 1: Choose Your Components
The first step in building your computer is selecting the right components. Here are the main parts you’ll need:
- Central Processing Unit (CPU): The heart of your computer, responsible for processing data. Choose a CPU based on your needs (e.g., Intel or AMD).
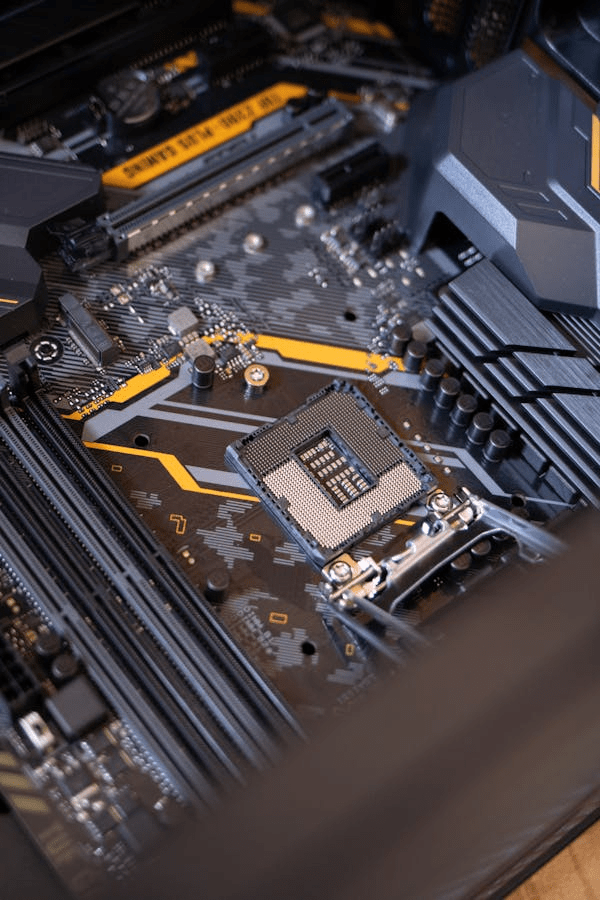
- Motherboard: The main circuit board that houses the CPU, RAM, and other components. Make sure it’s compatible with your CPU and other parts.
- Memory (RAM): Random Access Memory is essential for multitasking. 8GB to 16GB is usually sufficient for general use, but gamers or content creators might need more.
- Storage: You can opt for a Solid-State Drive (SSD) for faster performance or a Hard Disk Drive (HDD) for more storage space. Many users choose a combination of both.
- Graphics Card (GPU): A dedicated graphics card is necessary for gaming, video editing, or 3D rendering. If you’re just using your computer for basic tasks, the integrated graphics of the CPU might be sufficient.
- Power Supply Unit (PSU): The PSU provides power to all your components. Make sure it has enough wattage to support your build.
- Case: The case holds all your components and ensures proper airflow. Choose one with enough space for your parts.
- Cooling: Depending on your CPU and GPU, you may need extra cooling, like fans or a liquid cooling system, to prevent overheating.
Step 2: Prepare Your Workspace
Before you start assembling the computer, set up a clean, static-free workspace.
- What to Do:
- Find a large, flat surface, preferably with good lighting.
- Make sure you have all your components and tools ready. You’ll need a Phillips-head screwdriver, thermal paste (for CPU installation), and possibly anti-static wrist straps.
- Avoid building on surfaces that could generate static electricity, such as carpeted floors. An anti-static mat or wrist strap can help protect the components.
Step 3: Install the CPU
The CPU is the brain of your computer, and installing it correctly is crucial.
- What to Do:
- Open the CPU socket on the motherboard by lifting the retention arm.
- Align the CPU with the socket (there should be small notches that guide you). Gently place the CPU in the socket and lower the retention arm to lock it in place.
- Apply a small amount of thermal paste to the top of the CPU to help with heat dissipation. Spread it evenly using a plastic card or a specialized applicator.
Step 4: Install the RAM
Next, install the RAM into the motherboard slots.
- What to Do:
- Locate the RAM slots on the motherboard. You may need to open the clips on both sides of each slot.
- Align the RAM stick with the slot and gently press it down until it clicks into place. Make sure it’s securely locked in.
- If you have multiple RAM sticks, install them in pairs (following the motherboard’s manual for the best slots to use).
Step 5: Install the Storage Drives
Now, it’s time to install your storage (SSD and/or HDD).
- What to Do:
- For an SSD, find the appropriate M.2 slot or connect it to the motherboard using a SATA cable for a 2.5-inch SSD or HDD.
- For HDDs, secure the drive to the case using screws or tool-less brackets, and connect it to the motherboard using a SATA cable.
- Make sure to connect the power cables from the PSU to both the storage devices.
Step 6: Install the Power Supply (PSU)
The PSU is the power source for your entire system, so it needs to be properly installed and connected.
- What to Do:
- Place the PSU into the bottom or top of the case, depending on the case design.
- Secure it with screws and route the power cables through the case.
- Connect the 24-pin power cable to the motherboard and the 8-pin CPU power cable to the CPU socket.
- If you’re using a dedicated GPU, connect the appropriate power cables to the graphics card.
Step 7: Install the Graphics Card (GPU)
The GPU is essential for gaming, video editing, and other graphically intensive tasks.
- What to Do:
- Insert the GPU into the PCIe x16 slot on the motherboard.
- Secure the GPU with screws to the case to prevent it from moving.
- Connect the power cables from the PSU to the GPU (if required).
- If your motherboard has integrated graphics and you don’t plan to use a dedicated GPU, you can skip this step.
Step 8: Connect the Cooling System
Proper cooling is essential to prevent your system from overheating.
- What to Do:
- If you’re using air cooling, install the CPU cooler according to the manufacturer’s instructions. Most coolers will simply clip onto the CPU socket.
- For additional case cooling, install case fans in the designated areas of the case, ensuring airflow is optimized (intake at the front and exhaust at the back).
- If you’re using a liquid cooling system, follow the manufacturer’s instructions to mount the radiator and pump.
Step 9: Connect the Cables
Once all the major components are installed, it’s time to connect the cables.
- What to Do:
- Connect the power cables from the PSU to all components: motherboard, GPU, storage drives, and cooling system.
- Connect the front panel connectors (USB, power button, reset button, etc.) from the case to the motherboard, following the motherboard’s manual for guidance.
- Ensure that all cables are organized to improve airflow and prevent interference.
Step 10: Power On and Test the System
With everything connected, it’s time to power on your computer and make sure it works.
- What to Do:
- Double-check all connections and make sure everything is seated properly.
- Turn on the power supply and press the power button on the front of the case.
- If everything powers up correctly, you should see the motherboard’s POST (Power-On Self-Test) screen.
- Enter the BIOS/UEFI to make sure the components are recognized (CPU, RAM, storage devices, etc.).
Step 11: Install the Operating System
Now that your computer is assembled, you can install your preferred operating system (e.g., Windows, Linux, etc.).
- What to Do:
- Insert a bootable USB drive with the OS installation files and follow the on-screen instructions to install the OS.
- Install the necessary drivers for your motherboard, GPU, and other peripherals.

A Real-Life Experience: Building My First Computer
A couple of years ago, I decided to build my own custom PC. I had always used pre-built computers but wanted the satisfaction of assembling everything myself. After doing some research and gathering the components—CPU, motherboard, RAM, SSD, GPU, and more—I set up a clean workspace, made sure I had all the right tools, and began the build.
At first, everything seemed overwhelming, especially when it came to connecting the power cables and fitting the components into the case. But as I carefully followed each step, things started to fall into place. The most challenging part was installing the CPU and ensuring the thermal paste was spread evenly.
Once everything was connected, I powered on the system and, to my relief, it worked perfectly! The sense of accomplishment was huge. Building a computer from scratch not only saved me money but also taught me so much about how a PC operates. Now, whenever something goes wrong, I feel confident that I can troubleshoot and fix it myself. It was definitely a rewarding experience, and I recommend it to anyone interested in computers!

