

Learn how to create a compost pile to recycle organic waste and improve your garden soil. Follow this step-by-step guide to start composting at home and reduce waste.
Start composting today with these easy steps to create nutrient-rich soil for your garden.
Composting is a natural and environmentally friendly way to recycle organic waste and create nutrient-rich soil for your garden. Whether you have a small backyard or a larger outdoor space, creating a compost pile is a simple and effective way to reduce waste and improve your garden’s health. In this guide, we will show you how to create your compost pile, what materials to include, and how to maintain it for the best results.

Step 1: Choose the Right Location
The first step in creating a compost pile is selecting the ideal location in your yard.
- Pick a Well-Drained Area: Choose a spot with good drainage to avoid waterlogging. This will help aerate the pile and speed up decomposition.
- Avoid Direct Sunlight: While some sun is beneficial, too much direct sunlight can dry out the compost. Choose a partially shaded area for the best results.
- Accessible Spot: Make sure the location is easily accessible, as you’ll need to turn the pile regularly and add materials.
Step 2: Gather the Materials for Composting
Composting works best when you use a mix of “green” and “brown” materials.
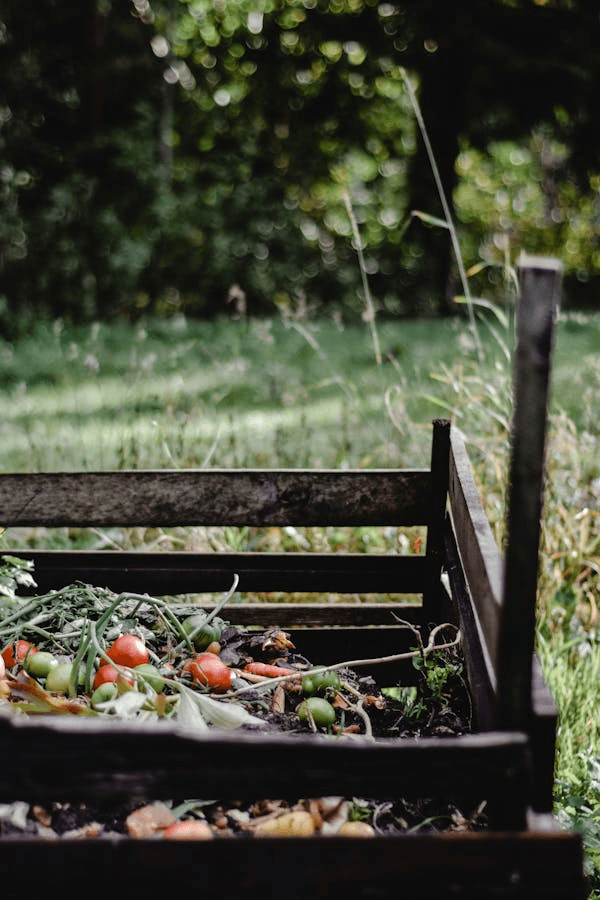
- Green Materials (Nitrogen-Rich): These include kitchen scraps, fresh grass clippings, coffee grounds, fruit and vegetable peels, and other green organic waste.
- Brown Materials (Carbon-Rich): These include dry leaves, straw, shredded paper, cardboard, and wood chips. Brown materials help balance the nitrogen and provide structure to the pile.
- Avoid Adding Meat and Dairy: Do not add meat, dairy, or greasy foods to the compost pile as they can attract pests and slow down decomposition.
Step 3: Create the Base Layer
Start building your compost pile by creating a base layer to encourage airflow and drainage.
- Start with Coarse Materials: Begin with coarse materials such as small branches, twigs, or straw. These will help aerate the compost and prevent it from compacting.
- Add Leaves or Shredded Paper: On top of the coarse materials, add a layer of brown materials, such as leaves or shredded newspaper. This will create a good foundation for the pile.
Step 4: Layer the Green and Brown Materials
Once the base layer is set, alternate between green and brown materials as you continue to build the pile.
- Alternate Layers: Aim to alternate 4 to 6-inch layers of green and brown materials. The right balance between green and brown helps the pile decompose efficiently. A general rule of thumb is 1 part green to 2 parts brown.
- Shred Materials: Shredding or chopping larger items such as leaves or cardboard will help them break down more quickly.
Step 5: Maintain Moisture and Aeration
To ensure proper decomposition, your compost pile needs to stay moist and well-aerated.
- Keep it Moist: The compost should be about as moist as a wrung-out sponge. If it’s too dry, add water or more green materials like fruit scraps. If it’s too wet, add more dry, brown materials to balance it out.
- Turn the Pile Regularly: Every few weeks, turn the compost pile with a pitchfork or shovel to provide oxygen and speed up the decomposition process. Aeration ensures that the microorganisms break down the organic materials efficiently.
Step 6: Monitor the Temperature
The temperature of the compost pile is an indicator of how well the decomposition process is progressing.
- Heat the Pile: A properly maintained compost pile will generate heat as it breaks down. The pile should be warm to the touch, ideally between 130°F and 160°F (54°C and 71°C).
- Turn the Pile to Maintain Heat: If the pile isn’t heating up, turning it regularly can help introduce more oxygen and jumpstart the process.
Step 7: Let It Decompose
Composting takes time, and the process can take anywhere from a few months to a year, depending on the size of the pile and the materials used.
- Wait for the Materials to Break Down: As the compost pile breaks down, it will shrink in size. Be patient and keep maintaining the right balance of green and brown materials, moisture, and aeration.
- Finish Product: When the compost is dark, crumbly, and smells earthy, it’s ready to use. At this stage, the original materials will have broken down into rich, nutrient-dense compost.
Step 8: Harvest the Compost
Once your compost is ready, it’s time to harvest it and use it in your garden.
- Screen the Compost: If you want to ensure a fine texture, you can screen the compost by passing it through a mesh or sifting it with a large strainer.
- Use it in Your Garden: Spread the compost on garden beds, mix it into the soil, or use it as a top dressing for your plants. It’s a natural fertilizer that will enrich your soil and promote healthy plant growth.
Conclusion
Creating a compost pile is a great way to recycle organic waste, reduce your carbon footprint, and enrich your garden soil. With the right materials, proper care, and patience, you can create a healthy compost pile that provides your plants with the nutrients they need to thrive. Whether you’re a gardening beginner or an experienced horticulturist, composting is a simple, sustainable, and rewarding practice that benefits both your garden and the environment.
Real-Life Experience: Starting My Compost Pile
A couple of years ago, I decided to start composting in my backyard. My goal was to reduce kitchen waste and improve the soil in my garden. At first, I was unsure of where to start, but after reading a few guides and watching videos, I found that the process was much simpler than I thought.
I began by choosing a spot in my yard that had good drainage but wasn’t in direct sunlight all day. I gathered all my materials: kitchen scraps (like fruit peels and coffee grounds), dry leaves, and some shredded paper. I started by layering coarse materials like twigs at the bottom to help with airflow, then alternated between green and brown materials in layers.
I made sure the pile stayed moist but not too wet, and every few weeks, I’d turn the pile to keep it aerated. Over time, the pile shrank, and after a few months, it turned into dark, crumbly compost. I sifted it to make sure it was fine and used it in my garden beds. My plants thrived, and I felt great about reducing my waste and giving back to the earth!


