

How to Make DIY Macrame Wall Hangings – Step-by-Step Guide
Learn how to create stunning DIY macrame wall hangings with this easy-to-follow guide. Discover essential knots, tools, and techniques to design your unique home decor piece.
Introduction
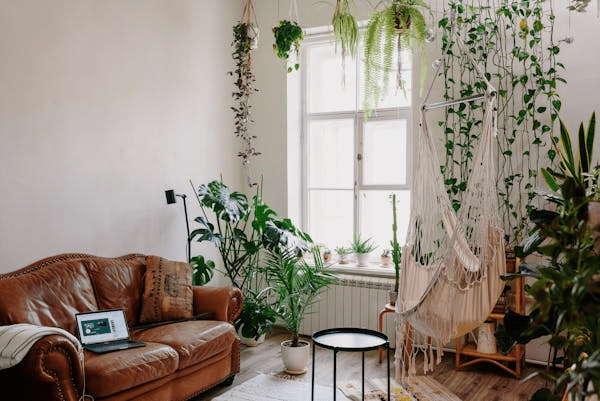
Macrame wall hangings are a beautiful and trendy way to add texture and personality to any space. These handcrafted pieces, made by knotting cords in intricate patterns, bring a touch of boho chic to your home.
Creating a DIY macrame wall hanging is a fun and rewarding craft project that anyone can try, whether you’re a beginner or an experienced crafter. In this guide, we’ll walk you through the step-by-step process of making your own macrame wall hanging, from choosing the right materials to tying the perfect knots.
What You’ll Learn in This Guide
In this tutorial, we’ll teach you the basic macrame knots, help you select the right cords, and guide you through the creative process of making a beautiful wall hanging for your home. By the end of this guide, you’ll be ready to design your own macrame wall art, customize it to your liking, and add a handmade touch to your living space.
Gather Your Materials
Before you begin, it’s essential to gather all the materials you’ll need. Here’s what you’ll need to get started:
- Macrame Cord: The most commonly used cords are cotton, jute, or hemp. You can choose from a variety of thicknesses depending on the desired look. For beginners, it’s recommended to use a 3mm or 4mm cotton cord as it’s easier to work with.
- Wooden Dowel or Branch: A dowel or branch is used as the base for your wall hanging. Choose one that suits the size of your design. A wooden dowel or even a driftwood branch can give your project a natural, rustic feel.
- Scissors: You’ll need a good pair of scissors to cut your cords to size.
- Measuring Tape or Ruler: To ensure your cords are cut to the right length.
- Optional: Beads or decorative elements for added flair to your macrame design.
Choose Your Macrame Design and Plan Your Project
There are many different styles and designs of macrame wall hangings, ranging from simple geometric patterns to intricate, flowing shapes. Start by deciding on the style you want for your piece. Here are some design ideas to inspire you:
- Simple Geometric Patterns: Clean lines and geometric shapes create a modern and minimalist look.
- Feathers or Tassels: Adding feathers or tassels to your macrame piece creates a playful, textured look.
- Boho Fringe: Classic fringe, where cords hang down in layers, gives a relaxed and bohemian feel.
Once you have an idea of the design you want, sketch it out roughly on paper or find inspiration online. This will help you plan the number of cords you need and how you’ll structure the piece.
Measure and Cut Your Cords
To begin, measure and cut your macrame cords to the desired length.
- Standard Measurement: A good rule of thumb is to cut each cord at least 4 times the length of the finished wall hanging. For example, if you want your wall hanging to be 24 inches long, cut each cord to approximately 96 inches.
- Tip: It’s always better to have extra length than not enough, so cut a little longer just in case.
Learn the Basic Macrame Knots
The key to making beautiful macrame wall hangings lies in the knots. Here are three basic knots you’ll use throughout your project:
- Lark’s Head Knot: This knot is used to attach your cords to the dowel. To tie this knot, fold the cord in half, place the loop over the dowel, and pull the ends through the loop to secure it.
- Square Knot: The square knot is one of the most common macrame knots. To make it, take two outer cords and cross them over the two center cords, creating a loop. Then, pull the ends under and through the loop to create the knot. Repeat to form a row of square knots.
- Half Hitch Knot: This knot is used to create patterns and shapes. To make it, take one cord and place it over the adjacent cord, then pull it under and through the loop. Repeat this along a row or in a diagonal pattern.
These basic knots are the foundation of any macrame design, and once you master them, you can create intricate patterns and beautiful textures for your wall hanging.
Start Knitting Your Wall Hanging
Once you’re comfortable with the basic knots, it’s time to start creating your macrame design. Here’s a basic process to follow:
- Attach the Cords to the Dowel: Use the lark’s head knot to attach your cords to the wooden dowel. Start by folding each cord in half and looping it over the dowel.
- Create Your Pattern: Begin tying square knots, half hitch knots, or any other designs you’ve planned. Play with different knotting techniques to create a unique and personalized pattern.
- Add Layers or Tassels (Optional): Once you’ve finished your knotting, you can add decorative elements like tassels, beads, or feathers to enhance the piece.
Take your time and enjoy the process! Macrame is all about patience and creativity.
Finish and Hang Your Wall Hanging
After you’ve completed the knotting part of your wall hanging, you’ll want to finish it and prepare it for display:
- Trim the Bottom: If you want a neat, even finish, trim the ends of your cords so they’re all the same length. Alternatively, you can leave the cords longer for a more rustic, fringed look.
- Secure the Knots: Make sure all your knots are tight and secure. If necessary, use fabric glue or a small dab of hot glue to hold the knots in place.
- Attach to the Wall: Use a nail or hook to hang your wall hanging from the dowel, or tie a string around the dowel for an easy hanging solution.
Final Tips & Conclusion
- Experiment with Different Materials: If you’re feeling adventurous, try using different types of cord, such as velvet or leather, to create unique textures.
- Add Color: You can dye the cords before starting your project for a pop of color that suits your room’s décor.
- Practice: Don’t be discouraged if your first wall hanging doesn’t turn out perfectly. Like any craft, macrame takes practice!
Making DIY macrame wall hangings is a creative and relaxing craft that allows you to add a personal touch to your home. With just a few simple materials, you can create beautiful, one-of-a-kind wall decor that reflects your unique style. Enjoy the process and let your creativity shine! 🌿✨
A Real-Life Experience: My First DIY Macrame Wall Hanging
A few years ago, I stumbled upon a gorgeous macrame wall hanging in a home decor store. It was intricate, boho-chic, and exactly what I wanted for my living room—until I checked the price tag. Determined to make one myself, I picked up some cotton cord, a wooden dowel, and watched countless tutorials, ready to dive into the world of macrame.
At first, I struggled. My knots were uneven, my design was lopsided, and I had to undo my work more times than I could count. But after some patience (and a few cups of coffee), I started getting the hang of it. Slowly but surely, my creation took shape—a simple yet elegant wall hanging that I proudly displayed in my home.
The best part? Every time someone complimented it, I could say, “I made that!” That feeling of accomplishment was worth every tangled knot and mistake along the way.
If you’re looking to create your own macrame masterpiece, you’re in the right place! This guide will take you through everything you need to know—from essential knots to creative design ideas—so you can craft a beautiful wall hanging with confidence. Let’s get started! 🌿✨


