

How to Make Personalized Greeting Cards by Hand – Step-by-Step Guide
Learn how to create personalized greeting cards by hand with this easy-to-follow guide. Discover unique design ideas, materials, and techniques to make your cards extra special.

Introduction
There’s something truly special about a handmade greeting card. Whether it’s for a birthday, holiday, or just a thoughtful note, a personalized card adds a heartfelt touch that store-bought ones can’t match. By making your own greeting cards, you can add creativity, love, and a personal connection that’s sure to leave a lasting impression.
In this guide, we’ll take you through the process of designing and making your own greeting cards by hand. From choosing the right materials to adding custom decorations, you’ll learn everything you need to know to craft beautiful, personalized cards for any occasion.
What You’ll Learn in This Guide
This tutorial will walk you through the materials, techniques, and design ideas for creating personalized greeting cards by hand. You’ll learn about different paper types, simple card-making techniques, and ways to add a personal touch to make your cards truly unique. By the end of this guide, you’ll have the skills to make one-of-a-kind greeting cards for friends, family, and loved ones.
Gather Your Materials
Before you get started, make sure you have all the materials you need to create your greeting cards. Here’s a list of essential items:
- Cardstock or Paper: You’ll need sturdy paper or cardstock as the base for your card. Choose a color or texture that suits the occasion. For example, white or cream cardstock is great for a classic look, while pastel or bright colors can add a cheerful touch.
- Markers, Pens, or Stamps: Use fine-tip markers or pens for writing messages or adding decorative details. Stamps can also be used to create beautiful designs on your card.
- Glue or Double-Sided Tape: Adhesive is essential for attaching elements like embellishments, photos, or decorative pieces. Double-sided tape gives a clean finish, while glue allows you to attach heavier embellishments.
- Scissors or Craft Knife: You’ll need scissors to cut your paper and design elements. A craft knife is useful for precise cutting if you’re working on intricate designs.
- Decorative Items: Add embellishments such as buttons, ribbons, sequins, washi tape, or glitter to give your card a personalized flair. You can also use photos, pressed flowers, or scrapbook materials for a special touch.
- Stamps and Ink Pads (Optional): Rubber stamps with various designs, such as hearts, flowers, or greetings, can add texture and design to your cards.
Choose the Occasion and Design Your Card
Before you start creating your card, decide on the occasion and the overall design. Are you making a birthday card, a thank-you card, or a holiday greeting? Here are some tips for inspiration:
- Personalized Messages: Think about the person you’re making the card for and the message you want to convey. Whether it’s a funny, heartfelt, or motivational message, writing it by hand adds an intimate touch.
- Design Style: Choose a style that suits the person or occasion. For a birthday, you might want colorful patterns or illustrations, while a sympathy card might have soft, subtle colors and elegant fonts.
- Colors and Themes: Consider the color scheme you want to use. For example, red and pink are great for love-themed cards, while blues and whites are calming for sympathy or baby cards. You can also pick a theme, like floral, nature, vintage, or modern minimalist, to give your card cohesion.
Cut and Fold the Card Base
Once you’ve chosen your paper, it’s time to cut and fold it into a card. Follow these simple steps:
- Cut the Cardstock: Take a piece of cardstock and cut it to your desired size. A standard greeting card size is 5 x 7 inches, but you can experiment with smaller or larger cards if you prefer.
- Score the Fold: To create a clean, crisp fold, use a bone folder or the edge of a ruler to score the cardstock in the center before folding it. This helps avoid creases and makes folding easier.
- Fold the Card: Fold the cardstock in half along the scored line, pressing down firmly for a smooth, sharp crease.
Add a Personal Message
The personal message is the heart of any greeting card. Write something that resonates with the recipient, whether it’s a heartfelt note, a funny quote, or a special memory.
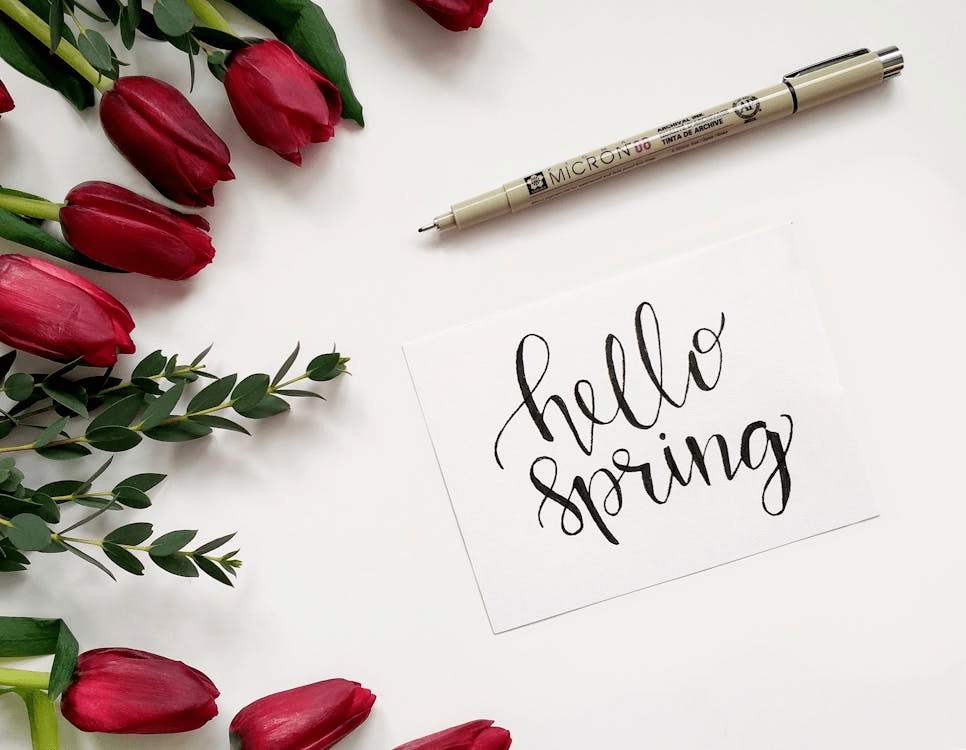
- Handwritten Messages: Write the message by hand to make it more personal. You can use different colored pens, markers, or calligraphy pens to add variety to the message.
- Add Quotes or Poems: If you’re stuck for words, consider adding a meaningful quote or poem that fits the occasion. You can find beautiful quotes for birthdays, anniversaries, or holidays online or in books.
Decorate and Embellish Your Card
Once your message is written, it’s time to add some decorations and embellishments. This is where you can get creative! Here are some ideas:
- Stamps and Ink: Use stamps to add designs like flowers, hearts, or simple shapes. Choose ink colors that match your card’s color scheme for a cohesive look.
- Hand-Drawn Designs: Add your own doodles, sketches, or borders around the edges of the card to make it feel more unique.
- Stickers and Washi Tape: Add some playful, colorful accents with stickers or washi tape. These can help frame the message or add extra design elements.
- Ribbons and Buttons: For a more textured look, glue a piece of ribbon, lace, or buttons onto the card. You can even create little bows or rosettes for extra flair.
- Sequins, Glitter, or Embossing: If you want to make your card sparkle, add sequins or glitter to certain areas. Alternatively, use embossing powder to give your card a professional, raised design.
Assemble and Finalize the Card
Now that your design is in place, it’s time to finalize your card:
- Layering Elements: If you’re adding multiple elements, such as a photo or a cut-out shape, use double-sided tape or foam tape to create dimension and make the elements stand out.
- Add a Border or Frame: Consider using a decorative border around the edge of the card, either with a pen, stamps, or additional paper cut-outs.
- Sign Your Card: Don’t forget to sign your card with a personal touch! You can sign it in the bottom corner or on the back of the card, depending on your style.
Envelopes and Presentation
Once your card is complete, you’ll need an envelope to present it in. You can buy envelopes or create your own using scrapbook paper or decorative cardstock.
- Personalized Envelopes: Decorate the envelope to match the card’s design. You can stamp a design or add a handwritten address in beautiful lettering for an extra special touch.
- Seal the Envelope: Consider using a wax seal, sticker, or washi tape to close the envelope for a personalized finishing touch.
Final Tips & Conclusion
- Practice Makes Perfect: If you’re new to card-making, don’t be discouraged if your first card doesn’t turn out perfectly. Practice and creativity will help you improve with each project.
- Experiment with Different Techniques: Try out different techniques like watercolors, brush lettering, or even pressed flowers to add variety to your cards.
- Use Leftover Materials: You can use scraps from other projects to create cards, reducing waste and making the most of your supplies.
Handmade greeting cards are a wonderful way to show someone you care, and the process of making them can be a creative, enjoyable experience. With a little time, patience, and creativity, you can craft personalized cards that are as unique and special as the people you’re giving them to. Enjoy the process and have fun making your own heartfelt creations! 🎨💌
A Real-Life Experience: My First Handmade Greeting Card
A few years ago, I found myself in a bit of a predicament. It was my best friend’s birthday, and I had completely forgotten to buy a card. Running to the store wasn’t an option, so I decided to get creative—I grabbed some cardstock, markers, and a few craft supplies I had lying around and set out to make my own greeting card.
At first, I wasn’t sure where to start. I sketched out a simple design, cut the paper to size, and added a personal message inside. Then, I found some ribbon from an old gift bag and used it to decorate the edges. I even attempted some hand lettering, though my first try was far from perfect! By the time I finished, I had a one-of-a-kind card that felt so much more special than anything I could have bought at a store.
When I handed it to my friend, she was genuinely touched. She told me it was the most meaningful card she had ever received because it was made just for her. That moment made me realize how powerful a handmade greeting card can be—it’s not just about the design, but the effort and love that go into creating it.
That’s why I put together this guide—to help you craft beautiful, personalized cards that will leave a lasting impression. Whether you’re making a birthday card, a thank-you note, or a holiday greeting, follow these simple steps and let your creativity shine! 🎨✨


